How to Install Windows 10, 8.1 or 7 Using a Bootable USB
How to install Windows 10 using bootable USB
- Plug your USB device into your computer’s USB port, and start up the computer. You may be asked to press a key to boot from the USB.
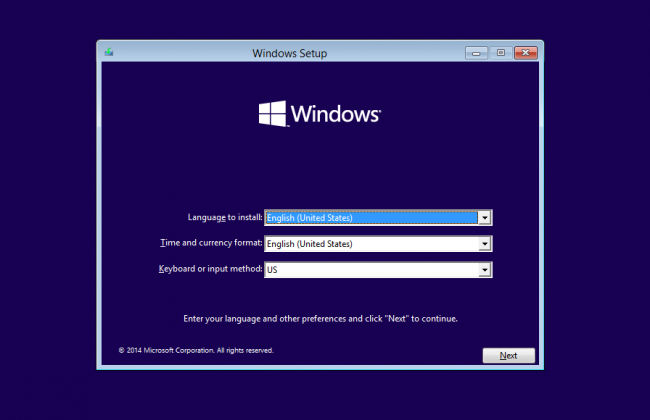
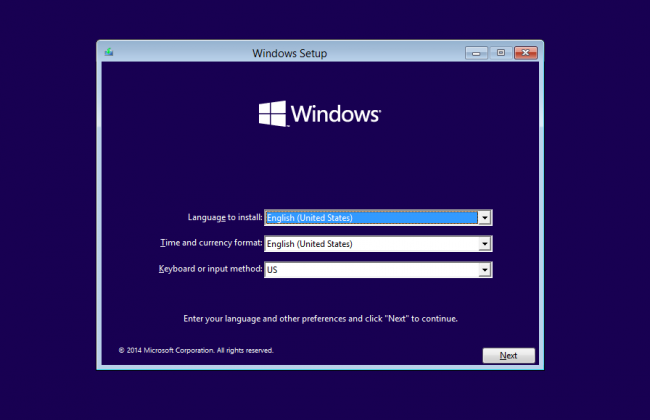
- Choose your preferred language, timezone, currency, and keyboard settings. Once you’re happy with customizing these settings, click Next. Don’t worry if you’ve made a mistake, you can change any of these in the future.
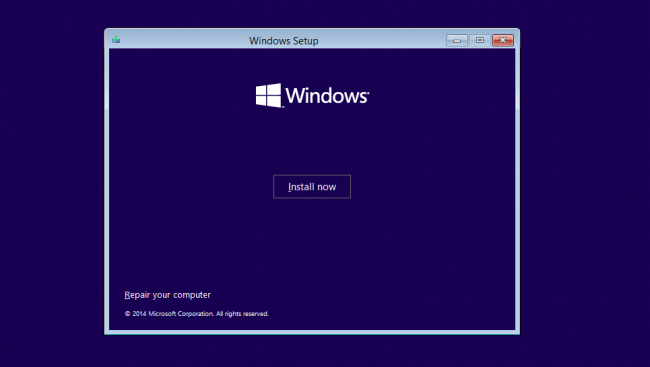
- Click Install Now and select the Windows 10 edition you’ve purchased. Now click Next to start the installation process.
- Choose your installation type. You can either choose Upgrade, which will allow keeping your current files, settings, and apps; or do a fresh clean installation by picking Custom. In this example, we’ll be choosing custom to do a fresh Windows installation.
- To install Windows, you need a partition on your hard drive for storing system files. Your computer’s hard drive is a physical storage device, while partitions divide up that storage space into separate parts.
- Note: If you haven’t yet backed up your hard drive, you may want to stop now, back everything up and start again. Once you’ve deleted the partitions you won’t be able to recover the data stored on these drives.
You can either use one of the existing partitions on your hard drive by formatting it or you can delete the ones there and create new ones from fresh instead: - To use one of the existing partitions, select it, and click Format.
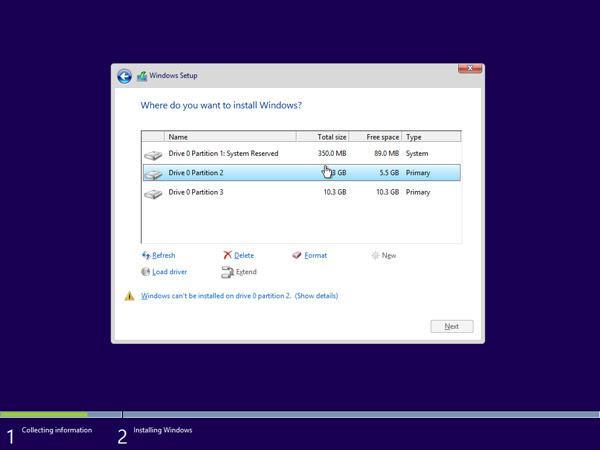
- To delete the existing partitions, select each one and click Delete, then OK.
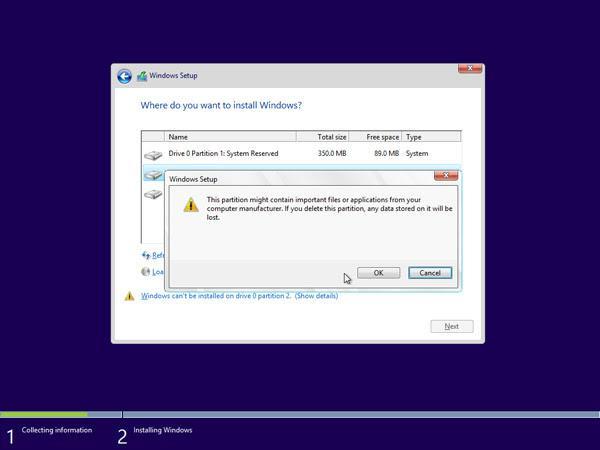
- If you’ve deleted all the existing partitions, your harddrive’s space will be unallocated, and you’ll need to create new partitions. If you just formatted an existing partition, then skip to Step 7 now. To create new partitions:
- Click Drive options (advanced).
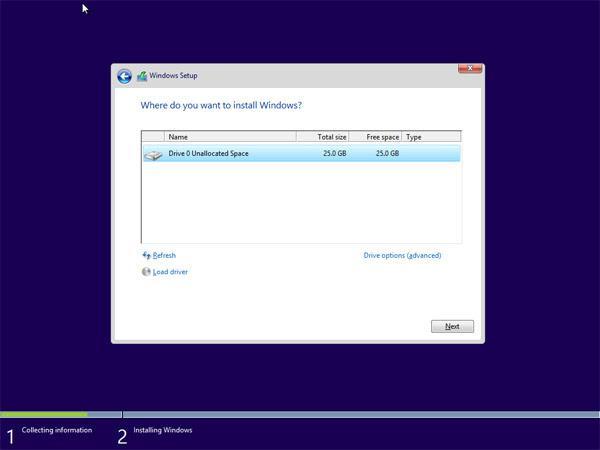
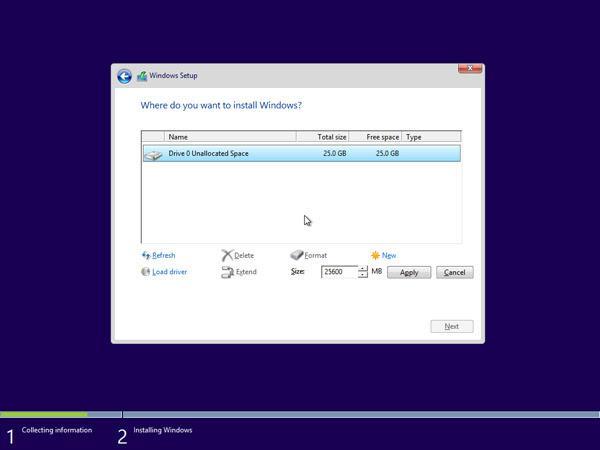
- Now click New and choose the size for your new partition, then click Next.
- Windows will now create a new partition for storing system files. Click OK to accept.
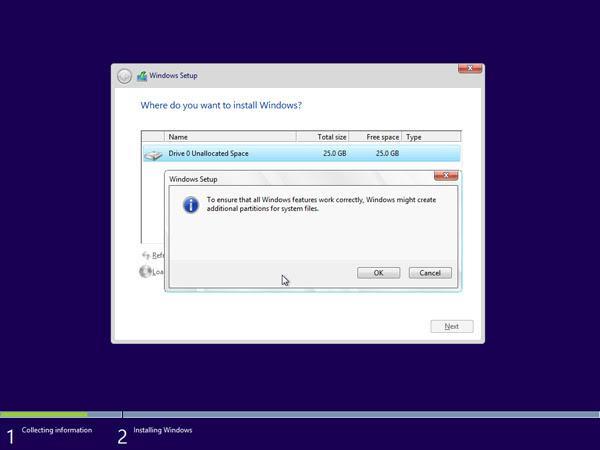
- Repeat this process if you wish to create more partitions.
Once you’ve finished creating all the partitions you want, format each one except for the partition you want to store your Windows system files on. Select the partitions one by one and click Format, then OK when prompted.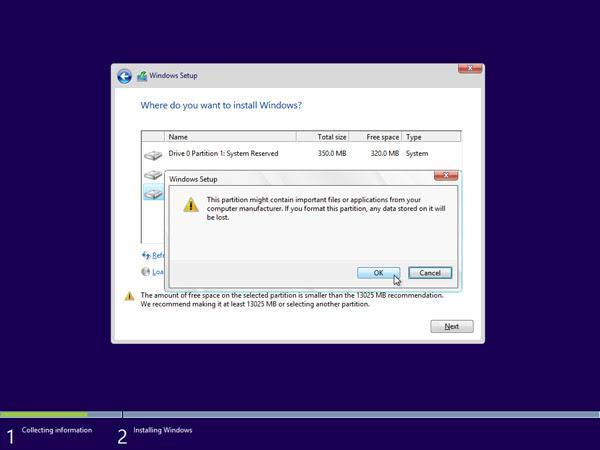
- Now select the partition where you want to install Windows and click Next. The Windows 10 installation will begin. Your computer may reboot a few times during the process. This is normal.
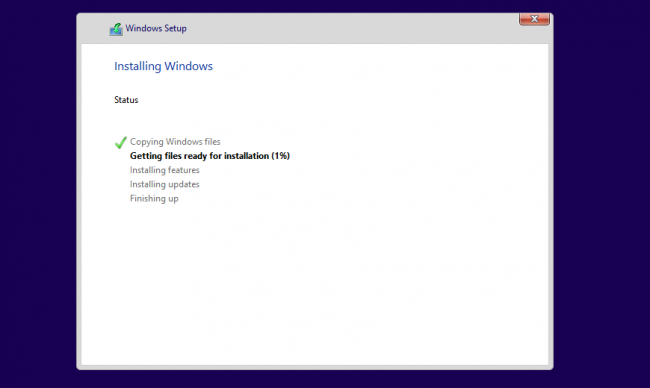
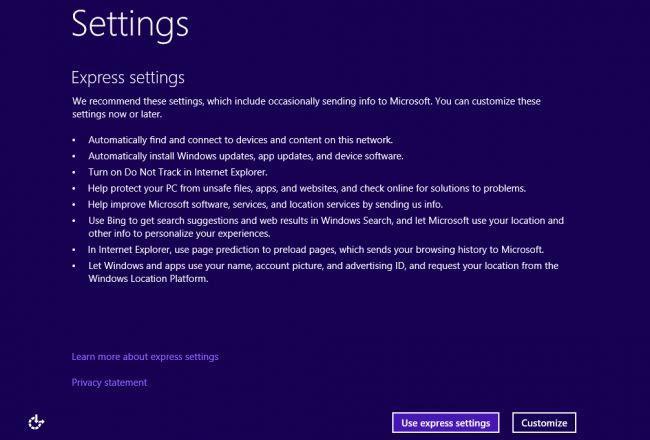
- After the installation is complete, your computer will automatically restart one last time. When it starts up again for the first time, you’ll be able to choose more of your settings, or you use express settings recommended by Microsoft.
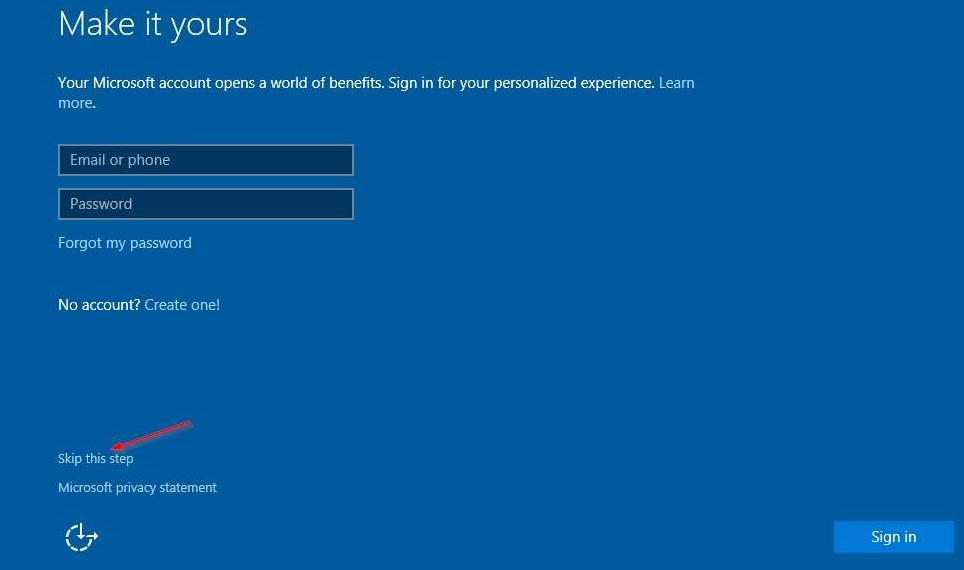
- Finally, sign in to your Microsoft account to use some of the new features with Windows 10 such as password recovery, and to access One Drive. If you don’t want to sign in with your Microsoft account, click Skip this step and follow the instructions to create a local user account instead.
How to install Windows 8.1 using bootable USB
- Plug your USB device into your computer’s USB port, and start up the computer. You may be asked to press a key to boot from the USB.
- Choose your preferred language, timezone, currency, and keyboard settings. Once you’re happy with customizing these settings, click Next. Don’t worry if you’ve made a mistake, you can change any of these in the future.
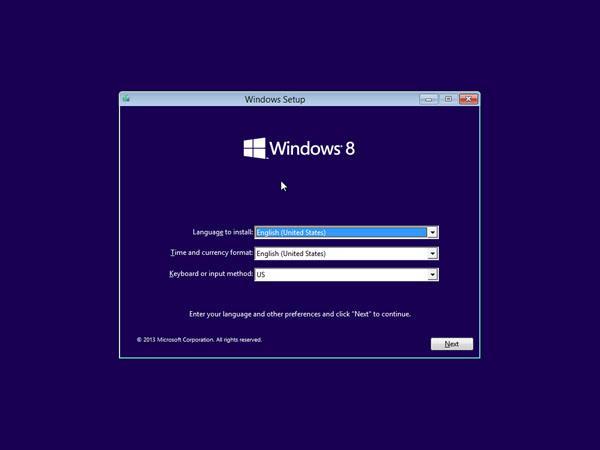
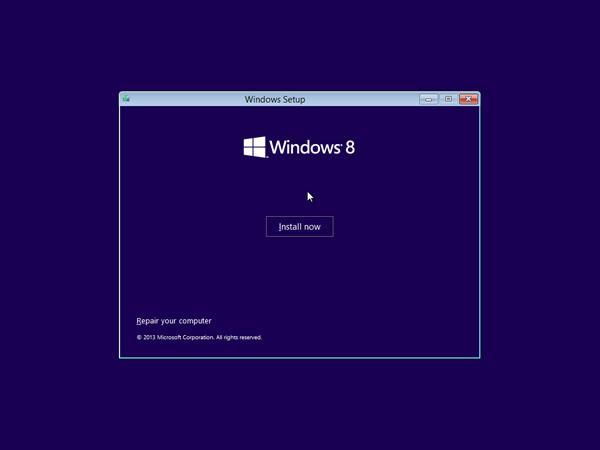
- Click Install Now and select the Windows 8.1 edition you’ve purchased. Now click Next to start the installation process.
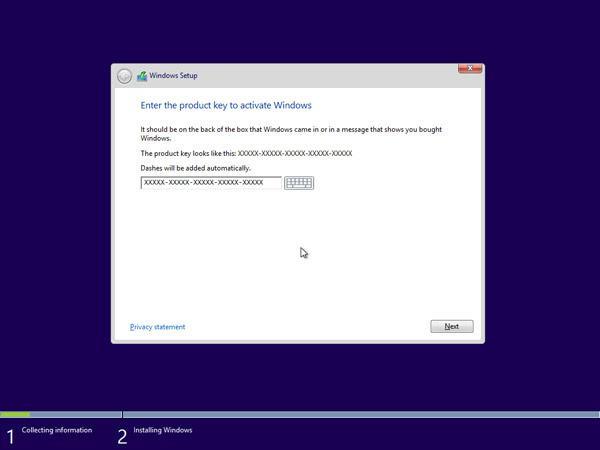
- Enter the product key that came with your Windows purchase to activate it. When done, click Next.
- Note: You might not be prompted to enter a product key until later in the Windows 8.1 installation. This varies from version to version.
- Accept the license terms and then click Next.

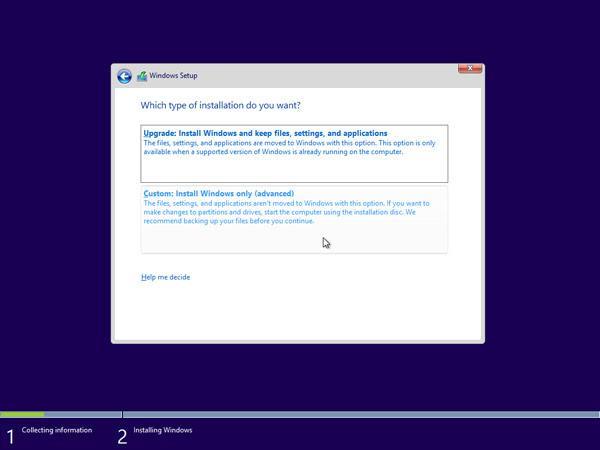
- Choose your preferred installation type. You can either choose Upgrade, which will allow keeping your current files, settings, and apps; or choose Custom to do a fresh clean installation of Windows 8.1. In this example, we’ll be choosing custom to do a fresh Windows installation.
- To do a completely fresh installation with new partitions, you have to delete all the existing partitions first. Select each partition one by one and click Delete, then OK.
- Note: If you haven’t yet backed up your hard drive, you may want to stop now, back everything up and start again. Once you’ve deleted the partitions you won’t be able to recover the data stored on these drives.
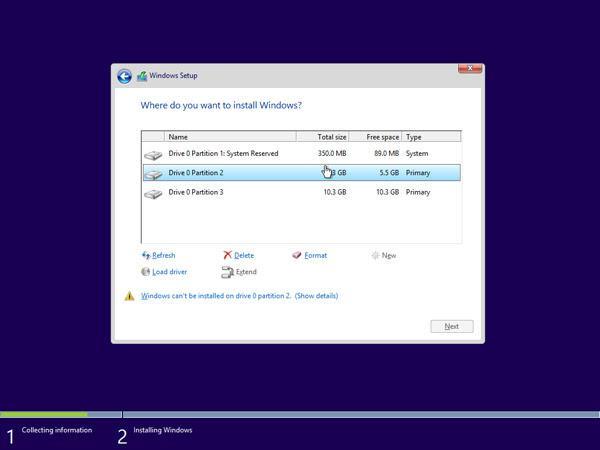
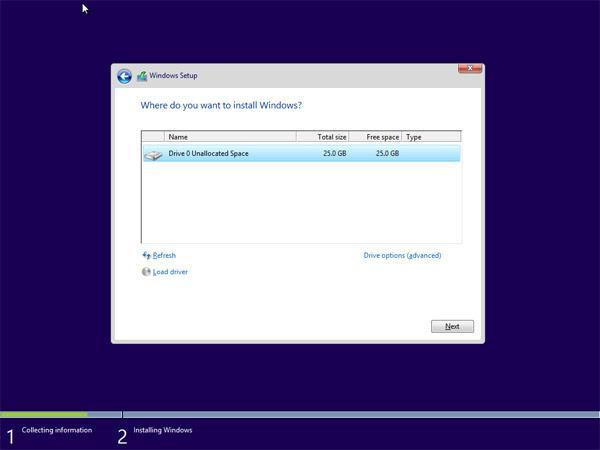
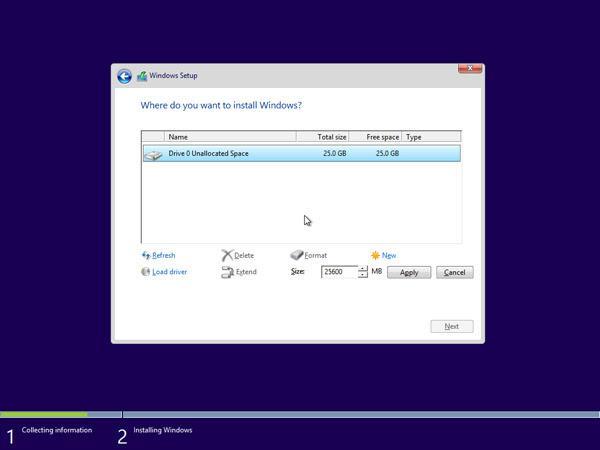
- Your computer harddrive’s space will now be unallocated. Following this, you need to create some new partitions. Select Drive options (advanced). Click New and choose the size for your new partition, then click Next.
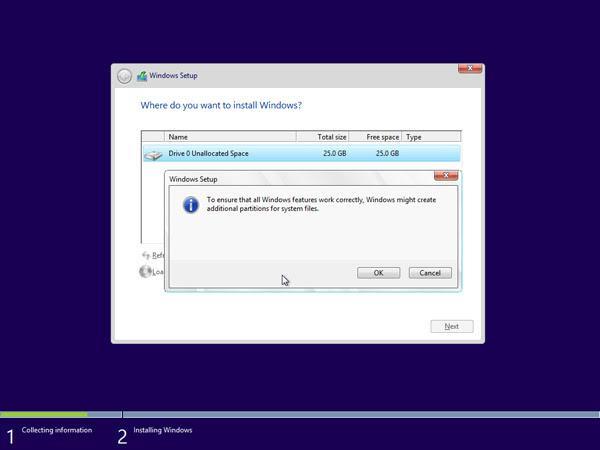
- Windows will now create a new partition for storing system files. Click OK to accept. Repeat this step if you wish to create additional partitions.
- Select one of the new partitions and click Format. This will allow you to format your new partition. Press OK when prompted, and repeat the process for any other partitions, except the one for storing system files.
- Select the partition where you want to install Windows, and click Next.

- The Windows 8.1 installation will now begin. Your computer may reboot a few times during the process. This is normal. Follow the instructions when instructed to personalize your computer settings.
How to install Windows 7 using Bootable USB
- Plug your USB device into your computer’s USB port, and start up the computer. You may be asked to press a key to boot from the USB.
- Choose your preferred language, timezone, currency, and keyboard settings. Once you’re happy with customizing these settings, click Next. Don’t worry if you’ve made a mistake, you can change any of these in the future.
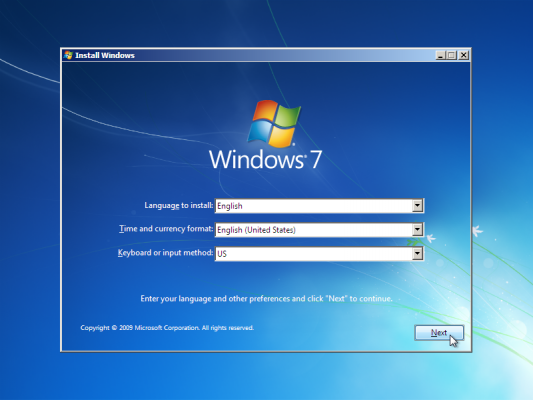
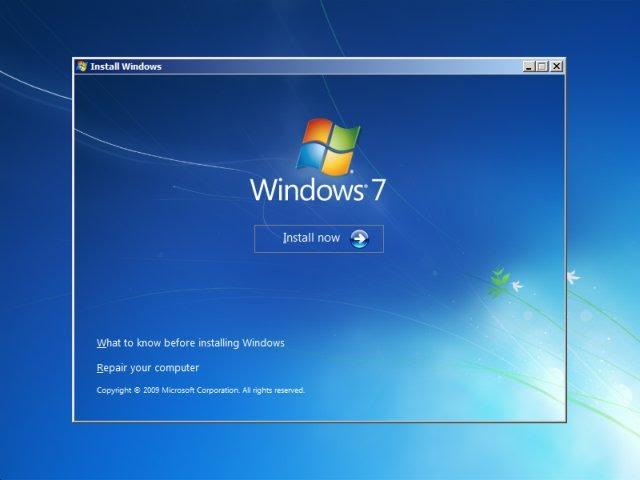
- Click Install Now to start the installation process.
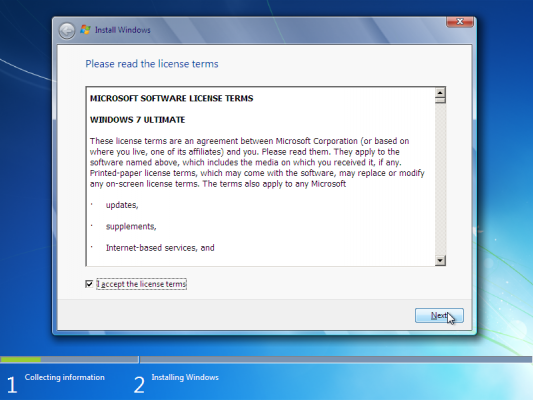
- Accept the license terms and then click Next.
- Choose your preferred installation type. You can either choose Upgrade, which will allow keeping your current files, settings, and apps; or choose Custom to do a fresh clean installation of Windows 7. In this example, we’ll be choosing custom to do a fresh Windows installation.

- To do a completely fresh installation with new partitions, you have to delete all the existing partitions first. Select each partition one by one and click Delete, then OK.
- Note: If you haven’t yet backed up your hard drive, you may want to stop now, back everything up and start again. Once you’ve deleted the partitions you won’t be able to recover the data stored on these drives.
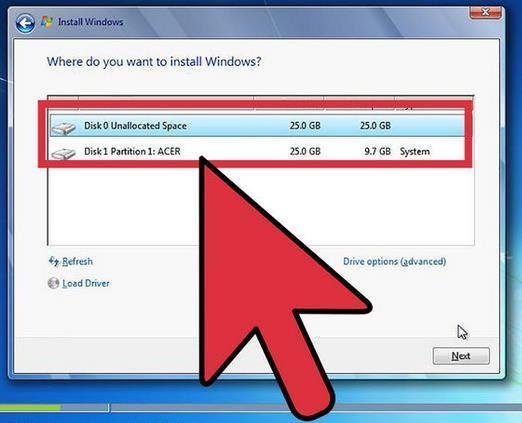
- Your computer harddrive’s space will now be unallocated. Following this, you need to create some new partitions. Select Drive options (advanced). Click New and choose the size for your new partition, then click Next.
- Windows will now create a new partition for storing system files. Click OK to accept. Repeat this step if you wish to create additional partitions.
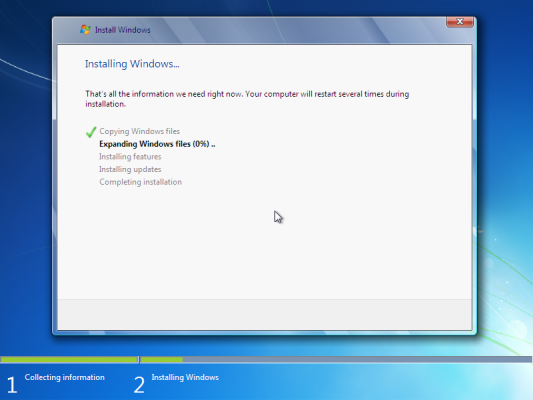
- Select one of the new partitions and click Format. This will allow you to format your new partition. Press OK when prompted, and repeat the process for any other partitions, except the one for storing system files.
- Select the partition where you want to install Windows, and click Next.
- Once the installation is complete, you’ll receive a prompt to set the user and computer names.
- Note: The built-in Administrator account is disabled on Windows 7, so the username you create will be the only one available on the system at first.
- Enter your username. The computer’s default name will be username-PC, where username is the username you’ve entered, but you can also change this. Once you’re done, click Next.
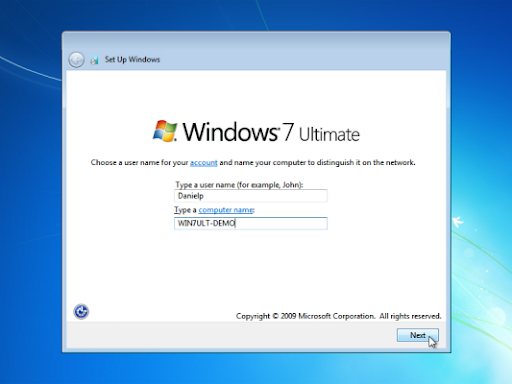
- Finally, enter the new user’s password, or just leave it blank and then click Next.
- Note: If you choose to create a password for your Windows 7 account, make sure to keep this safe. This will be the only user account on the system. If you lose it, you won’t be able to login to your Windows system later.
That’s it! You’ve now installed a fresh copy of Windows from a bootable USB on your computer.
You may want to run a Windows update next time you start up your computer and install the latest firmware/drivers available from your manufacturer, otherwise, you’re ready to go with your new Windows machine.
